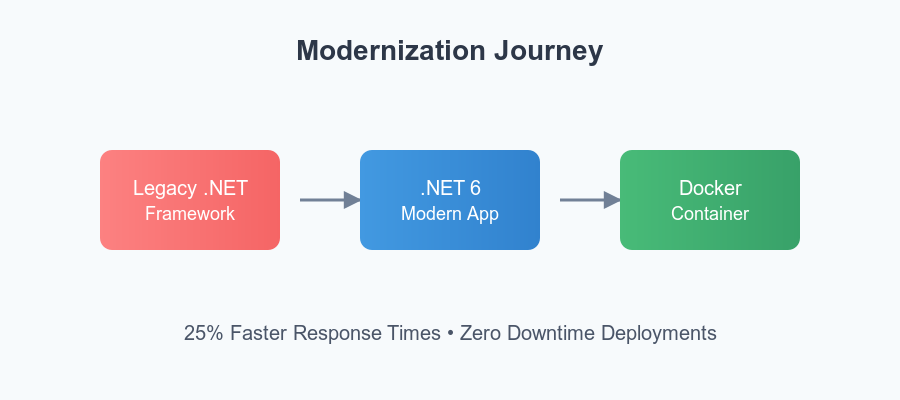
When a large financial services client needed to modernize their aging .NET Framework monolith, we saw an opportunity to bring them up to speed using .NET 6, Docker containers, and Azure DevOps. By containerizing their application, we improved portability, reduced deployment friction, and opened the door to robust scaling strategies with orchestrators like Azure Kubernetes Service (AKS). In this post, I’ll walk you through how we tackled this migration—from refactoring the codebase to automating builds and deployments.
Why Containerize Legacy Apps?
- Portability: Docker images run the same way on any environment, eliminating the “it works on my machine” syndrome.
- Scalability: Containers are lightweight and can be replicated quickly, allowing for responsive scaling under load.
- Consistent Environments: All dependencies are isolated within the container, reducing conflicts with system libraries or other apps.
- DevOps Integration: CI/CD pipelines become more straightforward when each build produces a self-contained Docker image.
Step 1: Assessing the Legacy Codebase
Our starting point was a .NET Framework 4.x monolith. Key challenges included:
- Mixed Concerns: Front-end MVC views, business logic, and data access tightly coupled in a single project.
- Hardcoded Configurations: AppSettings and connection strings spread across multiple web.config files.
- Incompatible Libraries: Several outdated NuGet packages lacked .NET Core/6 support.
To move forward:
- We created a “.NET 6 readiness” document enumerating incompatible libraries and potential replacements.
- We extracted key functionalities into separate class libraries where possible, leaving only the UI logic in the main project.
Step 2: Targeting .NET 6
We set up a new .NET 6 project and began refactoring, aiming to maintain feature parity with the legacy application. Here’s an example of how we migrated a basic MVC controller:
using Microsoft.AspNetCore.Mvc;
using MyCompany.Services;

namespace MyCompany.Web.Controllers
{
    public class AccountController : Controller
    {
        private readonly IAccountService _accountService;

        public AccountController(IAccountService accountService)
        {
            _accountService = accountService;
        }

        // GET: /Account/Login
        [HttpGet]
        public IActionResult Login()
        {
            return View();
        }

        // POST: /Account/Login
        [HttpPost]
        public IActionResult Login(string username, string password)
        {
            var isValidUser = _accountService.ValidateUser(username, password);
            if (isValidUser)
            {
                return RedirectToAction("Index", "Home");
            }

            ModelState.AddModelError("", "Invalid credentials");
            return View();
        }
    }
}
Key Refactoring Tips
- Dependency Injection: Replace static or service locator patterns with constructor injection.
- Configuration: Use
appsettings.jsonrather than web.config. - Middlewares: Migrate
Global.asaxlogic to ASP.NET Core middleware.
Step 3: Adding a Dockerfile
With the app now running on .NET 6, we introduced a Dockerfile to containerize it. Below is a simplified version:
# Use the official .NET 6 SDK image for building
FROM mcr.microsoft.com/dotnet/sdk:6.0 AS build
WORKDIR /app

# Copy the .csproj and restore dependencies
COPY MyCompany.Web/*.csproj ./MyCompany.Web/
RUN dotnet restore MyCompany.Web/MyCompany.Web.csproj

# Copy the entire source and build
COPY MyCompany.Web/. ./MyCompany.Web/
WORKDIR /app/MyCompany.Web
RUN dotnet publish -c Release -o out

# Use the .NET 6 runtime image for running
FROM mcr.microsoft.com/dotnet/aspnet:6.0 AS runtime
WORKDIR /app
COPY --from=build /app/MyCompany.Web/out ./
EXPOSE 80
ENTRYPOINT ["dotnet", "MyCompany.Web.dll"]
How It Works
- Build Stage: Uses the .NET SDK to restore NuGet packages, compile the app, and publish optimized binaries.
- Runtime Stage: Copies the published binaries into a lighter aspnet runtime image and sets
dotnet MyCompany.Web.dllas the entry point.
Step 4: Creating a CI/CD Pipeline in Azure DevOps
To automate builds and deployments, we set up an Azure DevOps pipeline. Here’s a typical YAML configuration:
trigger:
- main

pool:
  vmImage: 'windows-latest'

steps:
- task: DotNetCoreCLI@2
  inputs:
    command: 'restore'
    projects: '**/*.csproj'
- task: DotNetCoreCLI@2
  inputs:
    command: 'build'
    projects: '**/*.csproj'
    arguments: '--configuration Release'
- task: DotNetCoreCLI@2
  inputs:
    command: 'test'
    projects: '**/*Tests.csproj'
    arguments: '--configuration Release'
- task: Docker@2
  inputs:
    containerRegistry: 'MyRegistryConnection'
    repository: 'mycompany/app'
    command: 'buildAndPush'
    Dockerfile: '**/Dockerfile'
    tags: |
      latest
- task: KubernetesManifest@1
  inputs:
    kubernetesServiceConnection: 'MyKubernetesConnection'
    namespace: 'production'
    manifests: '**/*.yaml'
    containerImages: |
      myregistry.azurecr.io/mycompany/app:latest
    imagePullSecrets: |
      myregistry.azurecr.io
Key Steps
- Restore/Build/Test: Ensures code is valid and passes all unit tests.
- Docker Build and Push: Creates the Docker image and pushes it to a container registry (e.g., Azure Container Registry).
- Kubernetes Deployment: Optionally deploys the container to AKS or updates existing pods using rolling updates.
Step 5: Orchestrating with Kubernetes (Optional)
For production environments requiring high availability:
- Create a Deployment Manifest:yamlCopy
apiVersion: apps/v1 kind: Deployment metadata: name: mycompany-web spec: replicas: 3 selector: matchLabels: app: mycompany-web template: metadata: labels: app: mycompany-web spec: containers: - name: mycompany-web image: myregistry.azurecr.io/mycompany/app:latest ports: - containerPort: 80 - Create a Service to expose the deployment, possibly through a load balancer.
- Implement Horizontal Pod Autoscaling to handle surges in traffic based on CPU or memory utilization.
Performance & Security Considerations
- Caching: Use Azure Cache for Redis or in-memory caching for read-heavy scenarios.
- Secure Secrets: Store database connection strings and API keys in Azure Key Vault, referencing them in the container environment at runtime.
- Monitoring: Integrate Application Insights for end-to-end tracing, logs, and performance metrics.
- Load Testing: Tools like Azure Load Testing help confirm the container’s performance under real-world conditions.
Final Results
- Reduced Downtime: Containerization and rolling deployments allowed us to ship updates with zero downtime.
- Increased Performance: The switch to .NET 6 and removal of legacy dependencies cut API response times by ~25%.
- Scalability: Running in containers made it easy to scale up or down, especially in a Kubernetes environment.
- Improved Developer Workflow: Every commit triggers a pipeline that yields a production-ready Docker image, speeding up feedback loops.
Key Takeaways
- Refactor First: Clean your .NET codebase to ensure it’s .NET 6-ready before containerizing.
- Leverage Docker: Standardize builds and deployments across dev, QA, and production.
- Automate with CI/CD: Use Azure DevOps or GitHub Actions for frictionless builds, tests, and container pushes.
- Plan for Orchestration: Kubernetes or Azure App Service can handle high availability and auto-scaling once containers are in place.
Looking Ahead
Our next steps include:
- Implementing a Microservices Pattern: Splitting the monolith further into domain-based microservices.
- Experimenting with .NET 8: Taking advantage of upcoming performance enhancements and minimal APIs.
- Enhancing Observability: Adding distributed tracing and logging correlation across all containers.
- Security Hardening: Scanning images for vulnerabilities and employing advanced threat detection in Azure.
Migrating a legacy .NET Framework application to .NET 6 and Docker containers is a pivotal move for any organization seeking modern DevOps practices, scalability, and cost savings. With the right refactoring strategy, automated pipelines, and container orchestration, you can unlock a future-ready architecture that keeps pace with rapidly changing business demands.
Until next time, stay curious, keep coding, and never stop optimizing your .NET applications for the cloud era.